
Nothing beats the moment when that first sip of a perfectly thick milkshake hits your mouth on a sweltering summer day. Most people think making restaurant-quality milkshakes at home is complicated, but the truth is surprisingly simple. With just two basic ingredients and a few smart techniques, anyone can create creamy, dreamy milkshakes that rival those fancy ice cream parlors. The secret isn’t expensive equipment or special ingredients—it’s all about getting the ratios right and knowing a few insider tricks that make all the difference.
Getting the basic ratio exactly right
The foundation of any great milkshake comes down to nailing the perfect ice cream to milk ratio. Too much milk and the shake becomes watery and disappointing. Too little and it becomes impossible to blend or drink through a straw. The golden ratio that works every single time is one pint of ice cream to about two-thirds cup of whole milk. This creates that perfect consistency where the shake is thick enough to coat a spoon but still flows smoothly through a straw.
Whole milk makes the biggest difference in achieving that rich, creamy texture that defines a truly exceptional shake. Skim milk or low-fat alternatives will work in a pinch, but they simply can’t match the luxurious mouthfeel that whole milk provides. The fat content in whole milk helps bind everything together while adding that indulgent richness that makes homemade milkshakes taste so much better than store-bought versions. Some people even use half-and-half for extra decadence, though this can make the shake almost too rich for some tastes.
Why softening ice cream first changes everything
Most people grab ice cream straight from the freezer and wonder why their blender struggles or why they need to add way too much milk to get things moving. Rock-hard ice cream is the enemy of smooth milkshakes. Let the ice cream sit at room temperature for 10 to 15 minutes before scooping. When properly softened, the container should give slightly when squeezed, and the ice cream should scoop easily without requiring superhuman strength.
This simple step eliminates the need for excess milk, which is the main culprit behind thin, disappointing shakes. Softened ice cream blends effortlessly with the milk, creating that perfect lava-like consistency that pours beautifully but maintains its thickness. The waiting time also gives you a chance to chill your glasses in the freezer, which helps keep the finished shake cold longer. It’s a small detail that makes a huge difference in the final result, especially on hot days when milkshakes can quickly become soup.
Blending technique that prevents disasters
The order ingredients go into the blender matters more than most people realize. Always put the milk in first, followed by any syrups or extracts, and then the softened ice cream on top. This layering ensures the liquid reaches the blender blades first, creating the vortex needed to pull down the heavier ice cream. Starting with ice cream on the bottom often leads to chunks that never fully incorporate or motors that strain against the frozen mass.
Start blending on the lowest speed and gradually work up to medium, never going full blast. High speeds can actually work against you, creating air bubbles that make the shake foamy rather than creamy. The entire blending process should take about a minute, and the finished consistency should pour like thick lava. If the mixture seems too thick, add milk one tablespoon at a time. Perfect milkshakes require patience and gentle handling rather than aggressive blending that breaks down the texture.
Smart mix-ins that won’t ruin the texture
Adding cookies, candy, or fruit to milkshakes seems straightforward, but there’s definitely a right and wrong way to do it. The biggest mistake is adding mix-ins during the initial blending, which turns cookies into gritty powder and fruit into unrecognizable mush. Instead, blend the base milkshake completely first, then add mix-ins and pulse briefly just 6 to 8 times to incorporate them while maintaining their texture and identity.
Chop mix-ins to about half-inch pieces before adding them to ensure they’ll fit through a straw but still provide satisfying chunks. Oreo cookies, chocolate chip cookies, brownie pieces, and candy bars all work beautifully when handled this way. Fresh fruit like strawberries or bananas should be added during the initial blend since they integrate better when fully incorporated. Frozen fruit works even better because it helps thicken the shake while adding natural sweetness and vibrant color without watering down the base.
Choosing ice cream flavors that work best
Not all ice cream flavors translate equally well into milkshakes. Plain vanilla, chocolate, and strawberry remain classics because their smooth textures blend beautifully and their flavors intensify rather than muddle when mixed with milk. Ice creams that already contain chunks, swirls, or mix-ins can create textural chaos in the blender, turning add-ins into unappetizing bits that clog straws or create gritty textures that ruin the drinking experience.
Coffee ice cream makes incredible mocha shakes when combined with a tablespoon of chocolate syrup. Mint chocolate chip works wonderfully if you remove the chocolate chips first and add them back later using the pulse method. Premium ice creams with higher fat content generally create richer, more luxurious shakes than budget brands, though the difference becomes less noticeable once mixed with milk and other ingredients. Homemade ice cream produces the most exceptional results if you’re feeling ambitious enough to make your own base.
Simple upgrades that taste restaurant-quality
A tablespoon of malted milk powder transforms any milkshake into an old-fashioned malt that tastes like it came from a 1950s soda fountain. This secret ingredient adds depth and complexity that regular milkshakes simply can’t match. Vanilla extract, even just a teaspoon, amplifies the ice cream’s natural flavors and creates a more rounded taste profile. For chocolate shakes, a tablespoon of chocolate syrup mixed into the base creates richer chocolate flavor than relying solely on chocolate ice cream.
Strawberry jam works better than fresh strawberries for strawberry shakes because it provides concentrated flavor without excess water content that can thin the mixture. A pinch of salt might sound crazy, but it actually enhances sweetness and makes all the other flavors pop more dramatically. These small additions cost pennies but create noticeable improvements in both taste and complexity. The key is restraint—a little goes a long way, and too much of any flavoring can overpower the ice cream base that should remain the star.
Presentation tricks that impress every time
Chilled glasses make milkshakes stay cold longer and prevent immediate melting that turns thick shakes into thin disappointments. Stick tall glasses in the freezer for at least 15 minutes before serving, or keep them in the refrigerator if freezer space is limited. Drizzling chocolate or caramel sauce down the inside of the glass before pouring creates those professional-looking striped effects that make homemade shakes look like they came from an upscale ice cream parlor.
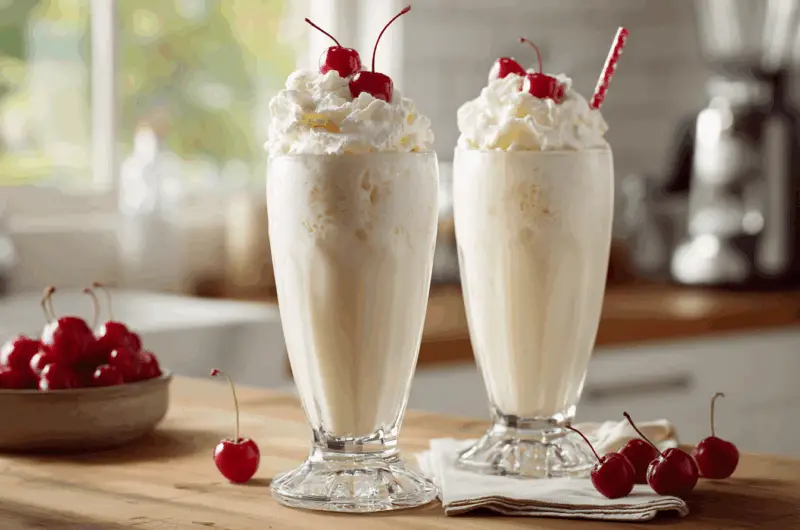
Whipped cream and a maraschino cherry remain classic toppings for good reason—they add visual appeal and extra indulgence without overwhelming the shake itself. Crushed cookies, chopped nuts, or colorful sprinkles around the rim create Instagram-worthy presentations that kids and adults both love. The key is not going overboard with toppings that compete with the shake. Simple, clean presentations often look more elegant than elaborate constructions that collapse before anyone can take a photo.
Troubleshooting common milkshake problems
Thin, watery milkshakes usually result from too much milk or ice cream that wasn’t properly softened before blending. The fix is simple: add more ice cream, one scoop at a time, until the desired thickness returns. Alternatively, putting the entire shake in the freezer for 10 minutes can help thicken it back up. Lumpy milkshakes typically happen when the ice cream was too hard or when ingredients weren’t layered properly in the blender.
Shakes that are too thick to drink through a straw need milk added gradually, one tablespoon at a time, with brief blending between additions. This prevents overcorrection that swings back to the opposite problem. Gritty textures usually come from over-blending mix-ins or using mix-ins that don’t belong in milkshakes. When in doubt, strain out problematic chunks and start fresh with the pulse method. Most milkshake problems have easy solutions that don’t require starting completely over from scratch.
Storage and make-ahead possibilities
Milkshakes taste best when consumed immediately, but leftovers can be saved in the freezer for up to two days in covered containers. The texture changes during storage, becoming more like soft-serve ice cream than a drinkable shake. To restore the proper consistency, let frozen shakes sit at room temperature for about 20 minutes, then stir vigorously with a spoon or reblend briefly to restore smoothness.
Making milkshakes ahead for parties is possible but requires planning. Prepare the base mixture and freeze it in individual cups, then remove from the freezer 15-20 minutes before serving and stir to restore the proper texture. This method works better than trying to keep liquid shakes cold, which inevitably leads to melting and disappointment. For large gatherings, consider setting up a milkshake bar with different ice cream flavors and mix-ins so guests can create their own custom combinations on demand.
Making perfect milkshakes at home really is as simple as getting the ratios right and following a few basic techniques. With softened ice cream, the proper milk amount, and gentle blending, anyone can create thick, creamy shakes that rival the best ice cream shops. The beauty lies in the simplicity—just two main ingredients transformed into something special through technique rather than complexity. Once these fundamentals become second nature, experimenting with different flavors and mix-ins becomes an enjoyable creative outlet that never gets old.
Perfect Classic Milkshake
Course: DessertCuisine: American2
servings5
minutes608
kcalA thick, creamy milkshake that rivals any ice cream parlor with just two simple ingredients and proven techniques.
Ingredients
1 pint vanilla ice cream (about 2 cups)
2/3 cup whole milk
1 tablespoon malted milk powder (optional)
1 teaspoon vanilla extract (optional)
Whipped cream for topping
Maraschino cherries for garnish
Chocolate syrup for drizzling (optional)
Directions
- Remove the ice cream from the freezer and let it sit at room temperature for 10-15 minutes until softened. The container should give slightly when squeezed and the ice cream should scoop easily without requiring excessive force.
- While the ice cream softens, place 2 tall glasses in the freezer to chill. If freezer space is limited, place them in the refrigerator instead. This helps keep the finished milkshakes cold longer.
- Add ingredients to the blender in this specific order: pour in the cold whole milk first, then add malted milk powder and vanilla extract if using. Finally, add the softened ice cream on top.
- Start blending on the lowest speed setting and gradually increase to medium speed. Blend for about 1 minute until the mixture is smooth and pours like thick lava. Stop and scrape down sides if needed.
- Check the consistency and adjust if needed. If too thick to pour, add milk 1 tablespoon at a time and blend briefly. If too thin, add another scoop of ice cream and blend until combined.
- Remove chilled glasses from freezer. If using chocolate syrup, drizzle it down the inside walls of each glass, rotating to create decorative stripes.
- Divide the milkshake evenly between the prepared glasses, pouring slowly to avoid disturbing any chocolate syrup designs. The shake should nearly fill each glass.
- Top each milkshake with a generous dollop of whipped cream and garnish with a maraschino cherry. Serve immediately with wide straws and long spoons for the full experience.
Notes
- Whole milk creates the creamiest texture, but 2% milk can be substituted if needed. Avoid using heavy cream as it may create butter chunks when blended.
- For mix-ins like cookies or candy, add them after the base is blended and pulse briefly 6-8 times to maintain texture.
- Leftover milkshakes can be frozen for up to 2 days. Let thaw for 20 minutes at room temperature and stir before serving.
Frequently asked questions
Q: Can I make milkshakes without a blender?
A: Yes, you can use an immersion blender or food processor instead. Work slowly in bursts to avoid overmixing, and make sure the ice cream is very soft before starting. A large whisk can work in a pinch if the ice cream is nearly melted.
Q: Why is my milkshake too thin and watery?
A: This usually happens from adding too much milk or not softening the ice cream enough first. Fix it by adding more ice cream one scoop at a time until you reach the desired thickness, or freeze the shake for 10 minutes to firm it up.
Q: How long do homemade milkshakes stay good?
A: Milkshakes taste best when consumed immediately but can be stored in the freezer for up to 2 days. They’ll become more like soft-serve ice cream, so let them thaw for 20 minutes and stir vigorously before drinking again.
Q: What’s the difference between a milkshake and a malt?
A: A malt is simply a milkshake with malted milk powder added, which creates a deeper, more complex flavor reminiscent of old-fashioned soda fountains. Add 1-2 tablespoons of malted milk powder to any milkshake recipe to transform it into a malt.
